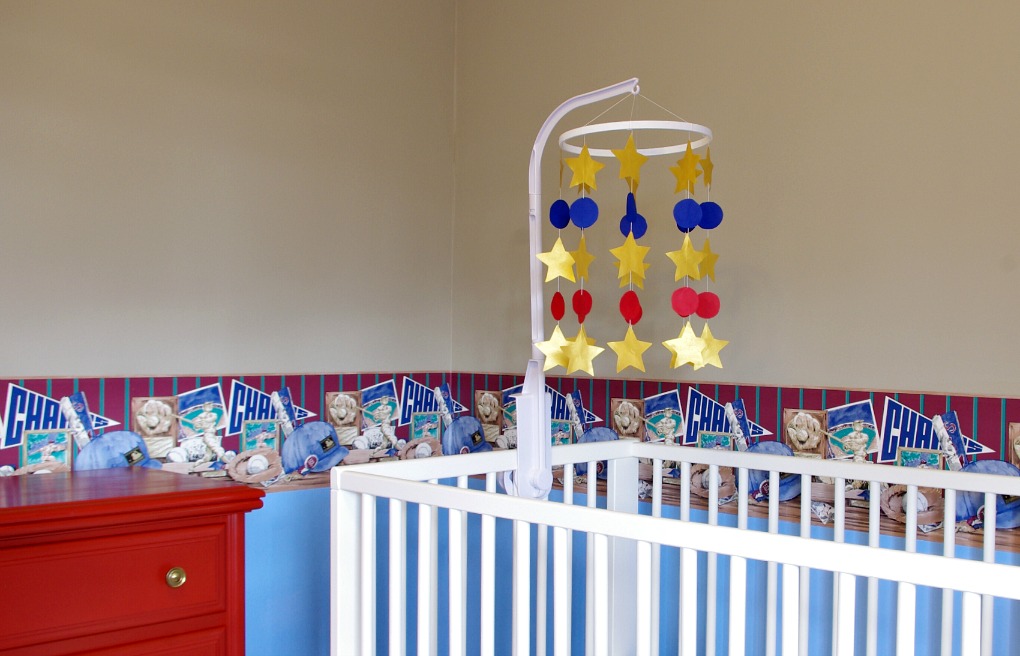
The newest addition to the baseball nursery is a mobile that I made myself. I already had a mobile from when my daughter was a baby, but the colors wouldn’t work with my son’s nursery. Instead, I made a new mobile using red, blue, and gold colors to go with the baseball theme.
I was able to use the piece of my daughter’s mobile that connected to the crib, so I didn’t have to come up with a way to hang the mobile from the crib or ceiling. This saved some time and made it a little easier.
The supplies I used to make the mobile are listed below. They mostly came from Hobby Lobby.
- 10-Inch Embroidery Hoop
- White Acrylic Paint
- Paint Brush
- Blue, Red, and Gold Cardstock
- Scissors
- Ruler
- Tacky Glue
- Crochet Thread

The first step was to paint the embroidery hoop with one coat of white paint. There are two pieces to the embroidery hoop, so I painted the part that made a complete circle. I didn’t use the other piece.
After that, I had to decide what type of design I wanted to use. I had seen some pictures of mobiles with circles of various sizes, baseballs, and stars. I had also seen some with ribbon and even some with small toys attached to them.
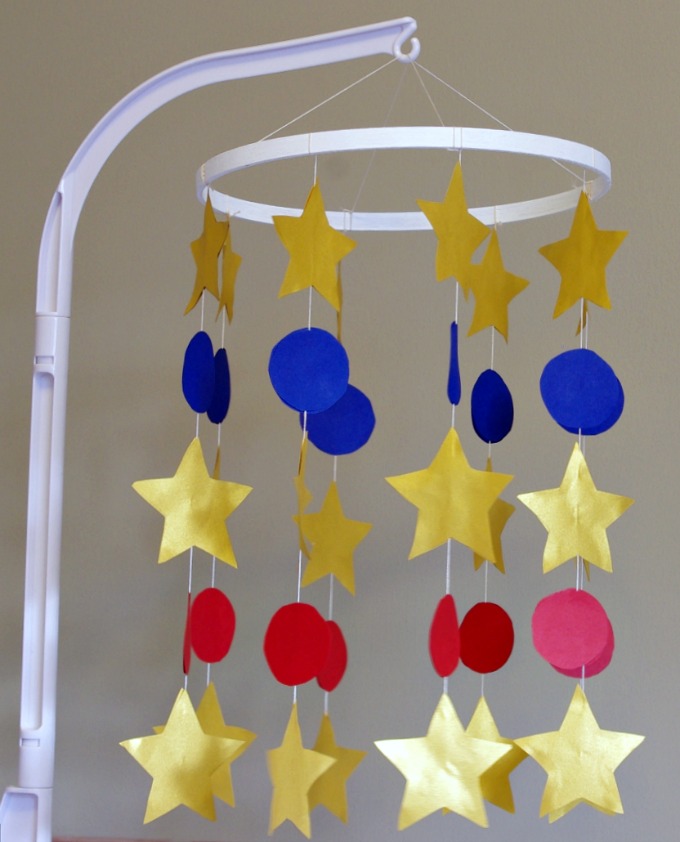
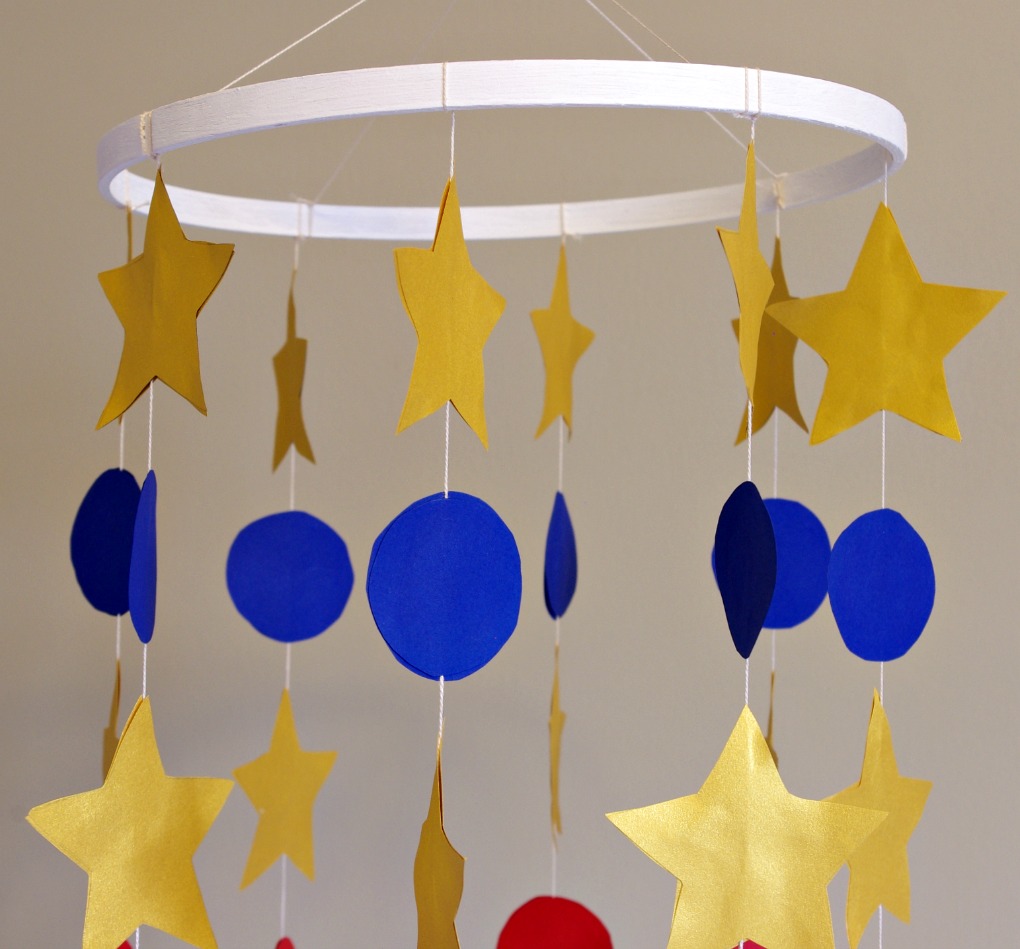
I decided to keep it simple and use a combination of circles and stars. The gold paper I found was perfect for stars, so I made a bunch of gold stars and added in some red and blue circles.
After experimenting with some different patterns, I finally decided on [Gold Star] → [Blue Circle] → [Gold Star] → [Red Circle] → [Gold Star]. Here is what the pattern looks like.
The stars were my favorite part, so I went a little crazy with the number of stars!

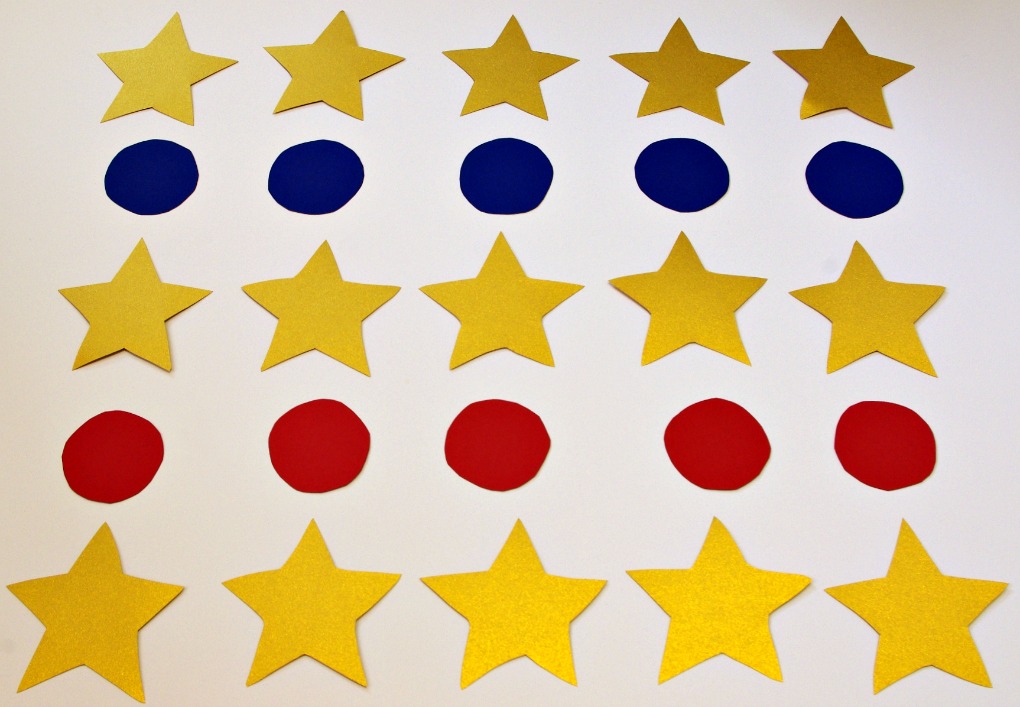
For every ONE circle or star on the strand, I cut out TWO circles or stars. This will make more sense later, but it was because of the way I was planning to attach the circles and stars to the thread. Based on the size of the embroidery hoop, I decided to hang eight strands on the mobile.
For those who are counting, the total number of circles and stars are listed below.
[1 Blue Circle Per Strand] x [2 For Attaching Purposes] x [8 Strands] = 16 Blue Circles
[1 Red Circle Per Strand] x [2 For Attaching Purposes] x [8 Strands] = 16 Red Circles
[3 Gold Stars Per Strand] x [2 For Attaching Purposes] x [8 Strands] = 48 Gold Stars
Cutting out this many circles and stars is pretty time consuming, so I recommend doing this while watching your favorite TV show or listening to your favorite music or podcast. I had some friends over and chatted with them while I worked.
When I was finally done with all of the cutting, it was time to attach the circles and stars to the thread.
Since I wanted the circles and stars to line up evenly, I did some measuring first. I found that 3 inches from the middle of a star to the middle of a circle looked best, so I marked the thread every 3 inches. Then I added a few inches to that so I would be able to easily tie the strands onto the embroidery hoop. My thread was 18 inches long, but this could vary a lot based on personal preference.
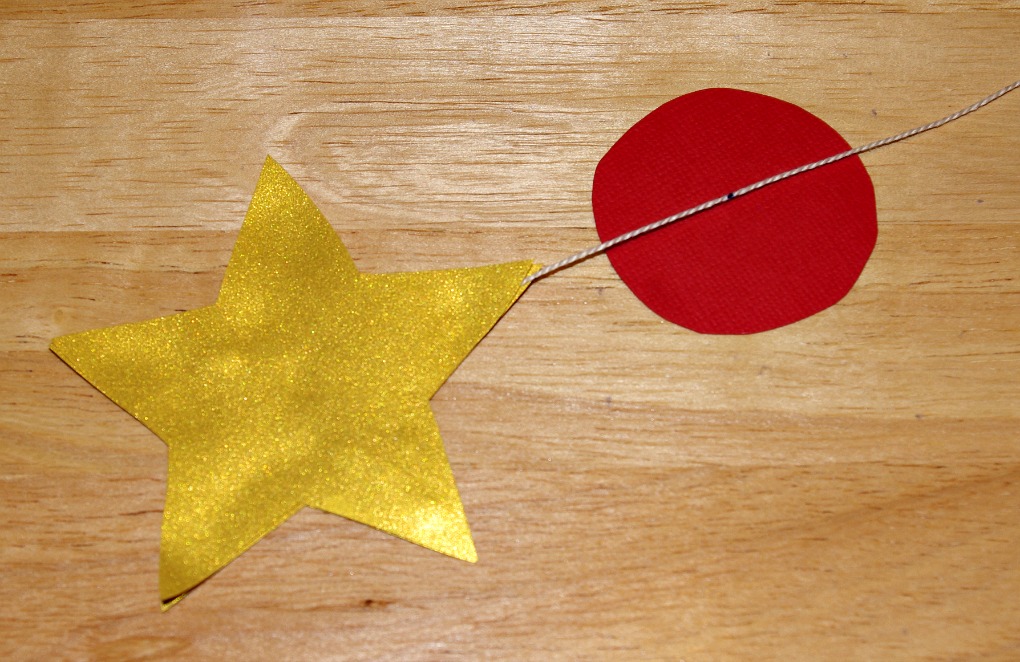
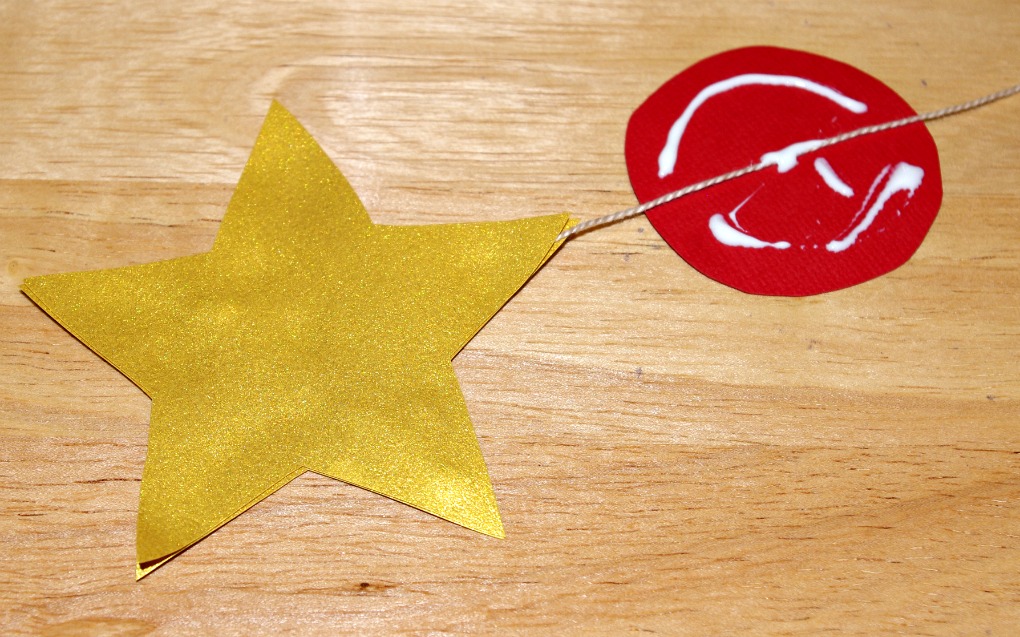
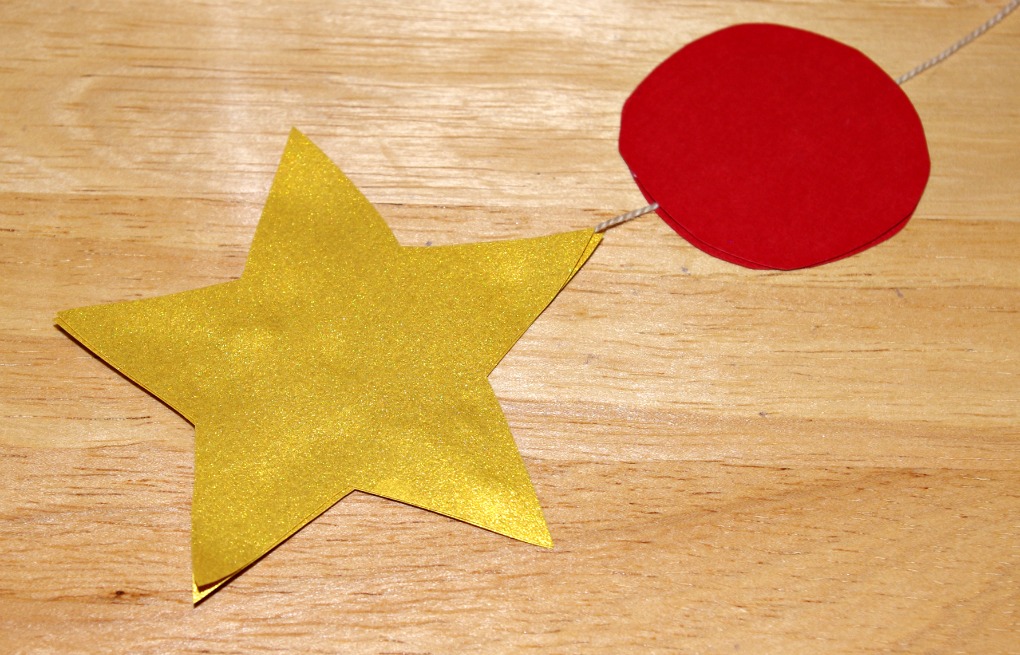
The easiest way that I found to glue on the stars/circles was to put a star/circle under the thread, add glue, and then place another star/circle on top. The pictures below explain what I am talking about.
After finishing all 8 strands, I tied them to the embroidery hoop and cut away the extra thread at the top that I had used to help tie the strand to the embroidery hoop.
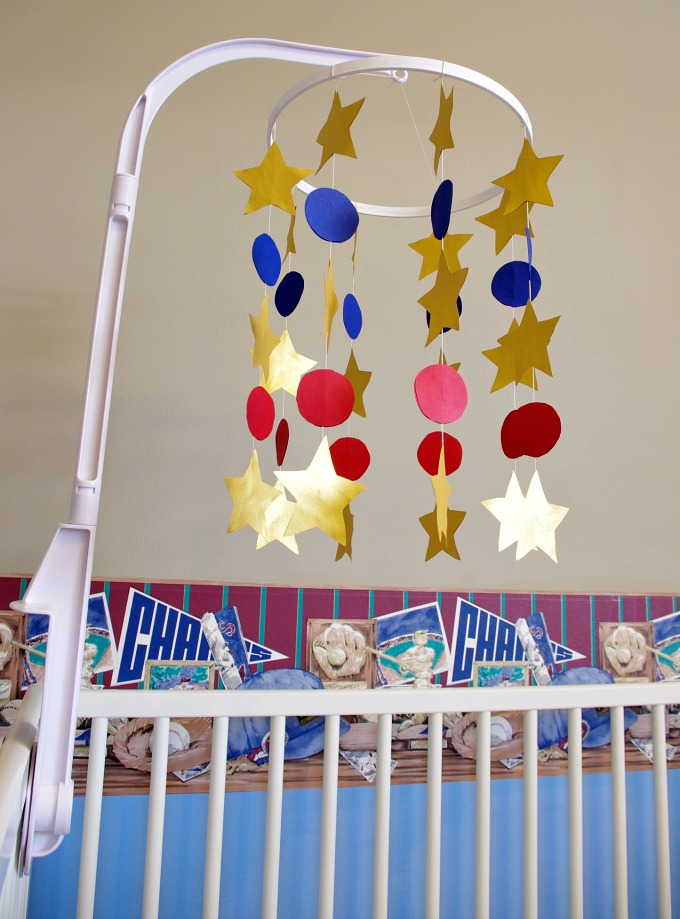
And here is the finished mobile.
Here is a close up version of the mobile.
I hope my son enjoys looking up at the shining stars!
Have a great day!
♥Jena♥
P.S. – If you want to follow along with the nursery progress, you can see how I painted the room here and how I painted a dresser here.
This post contains affiliate links. For more information, see my disclosures here.