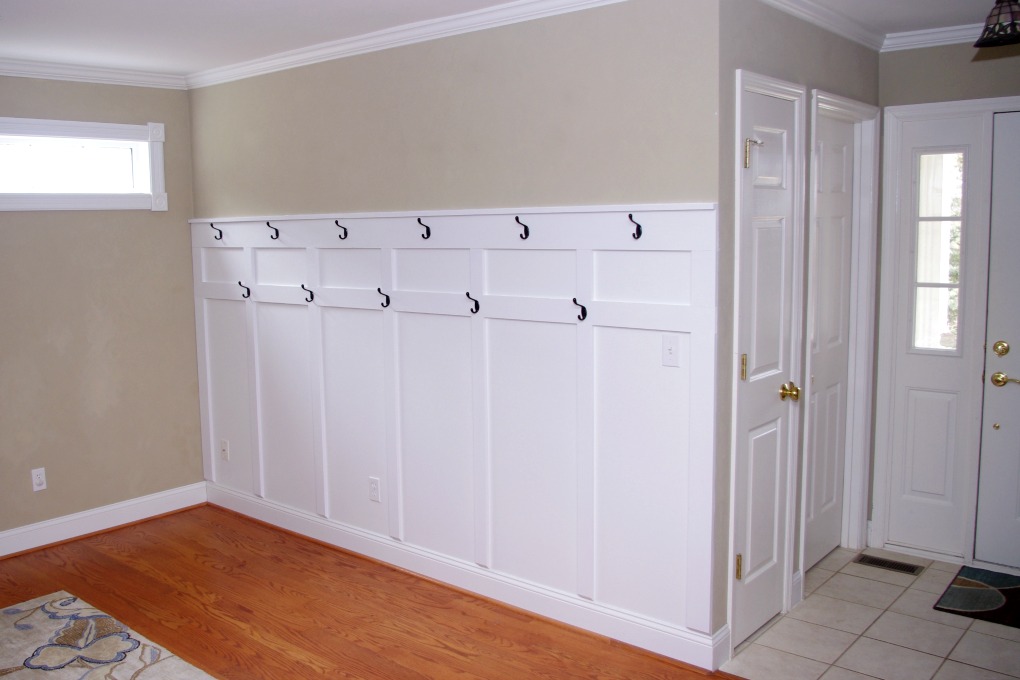
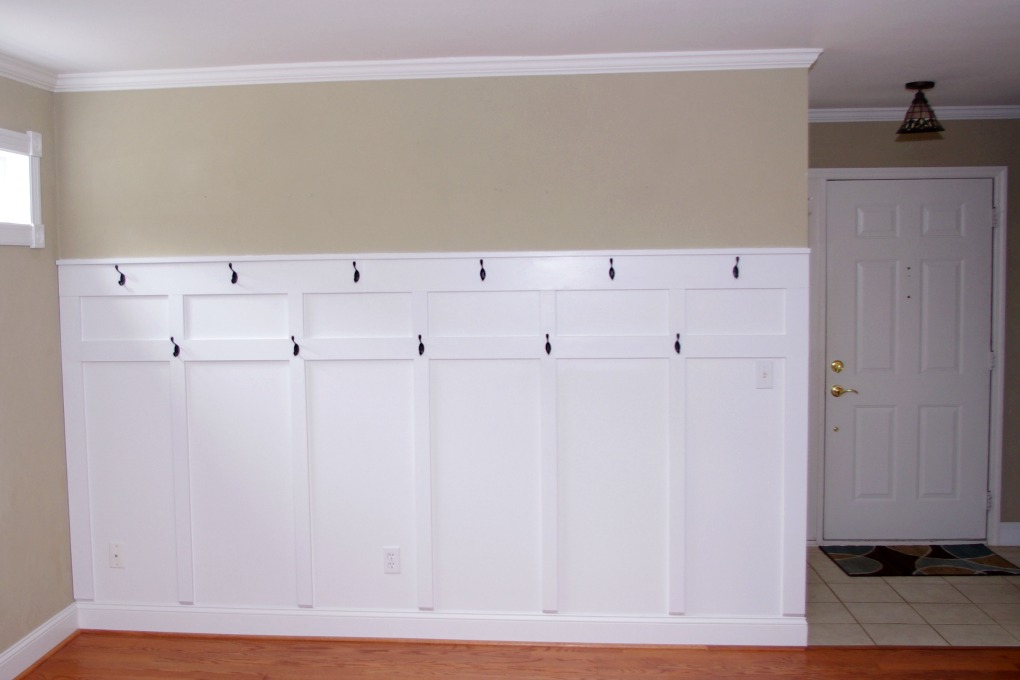
This board and batten entryway wall with hooks helps keep our home more organized!
I recently shared the board and batten entryway wall with hooks that we added to our house. Today, I am going into all of the details about exactly what I did to create this board and batten wall.
ALL OF THE DETAILS FOR THE BOARD AND BATTEN ENTRYWAY WALL WITH HOOKS
Our family has been using our new board and batten entryway wall with hooks recently and we love it! It was a fun project to do and has definitely helped us stay more organized! Below I am sharing details about how I decided where to put it, how I decided on the layout, the supplies I used, and how I built and painted it.
STEP ONE – CHOOSE A LOCATION
The first step for creating the board and batten wall was deciding where to put it. I looked at inspiration pictures on the internet and found a lot of great options. A board and batten wall can work in several different places. My goal was to choose the place in our house that would be the most functional for our family.
Below are the options I considered for where to put our board and batten wall with hooks. Each location had some pros and cons.
In The Garage
We typically enter the house through the garage, so it makes sense to have a mini-mudroom area in our garage. However, our garage is barely big enough to fit our two cars. Since there isn’t really a lot of extra room available, we decided not to put it in the garage.
Inside By The Garage Door
Since we usually enter the house through the door that leads to the garage, this would also be an ideal spot for a mini-mudroom. However, the door from the garage leads straight into the kitchen. Our kitchen is pretty small, so we decided we don’t have enough room there either.
Inside By The Front Door
When guests come over to our house, they come in through the front door. A spot right by the front door to hang coats would be convenient. However, the stairs to the basement are immediately to the left when walking through the front door. There is also a bathroom immediately to the right. This doesn’t leave any space for the board and batten either.
Coat Closet
Just past the bathroom is a small coat closet. This seemed like a great place for some hooks. However, the first floor of our house is all open and this is the only closet we have on that floor. Because of that, we keep our vacuum cleaner and other cleaning supplies in the coat closet. I couldn’t think of a better place to store the cleaning supplies, so they are staying in the coat closet for now.
Living Room
There is a living room area just past the coat closet. We actually have two living rooms, and this is the extra one. The closest wall to the front door was a big blank wall, so there was plenty of space for a mini-mudroom. At first, I wasn’t sure if I wanted the whole wall in the living room to be covered with hooks. Most of the example pictures I found on the internet were for areas smaller than our wall. In the end, however, we decided to put the board and batten wall with hooks here because it was the only place where we had enough space to do everything we wanted to do. There is also plenty of space for a bench and additional shoe storage.
STEP TWO – MAKE A PLAN
After choosing a location for the board and batten, it was time to make a plan! I made a plan for the board sizes, board locations, and hooks based on the size of the wall and location of the outlets and light switch.
Before doing anything permanent to the wall, I wanted to get a better idea of what the room would look like with the board and batten on it. I can be really indecisive, so I wanted to make sure I liked how it would look!
To do that, I cut plain computer paper into strips that resembled boards. Since I was planning to attach 1×6 boards, 1×4 boards, and 1×3 boards to the wall, I cut the paper to the exact measurements of these boards.
Then I taped them to the wall with painter’s tape in the arrangement that I wanted.
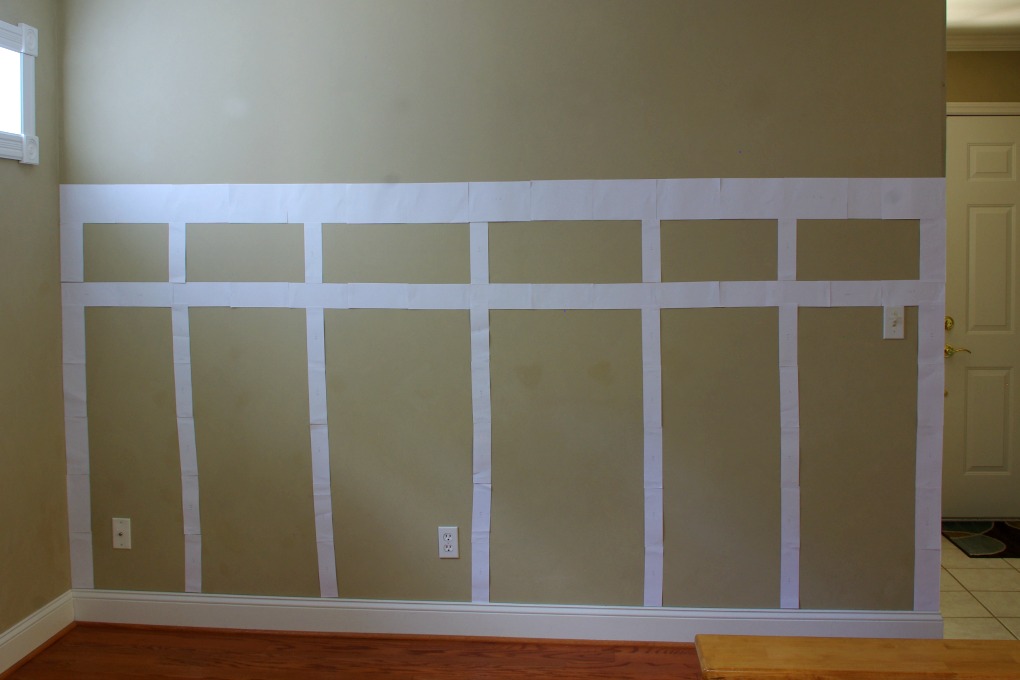
This actually ended up giving me a pretty good idea of what the wall would look like. Since the boards were going to be white, it was convenient that the computer paper was also white!
STEP THREE – GATHER SUPPLIES
After I had a plan for the wall and liked the way it looked, it was time to start gathering the supplies to build it!
The supplies I used for this project include:
- Tape Measure
- Frog Tape
- Large Paint Roller
- Small Paint Roller
- Angled Paint Brush
- Paint Tray
- Drop Cloth
- Primer
- Benjamin Moore Paint (Decorator’s White in Satin)
- 1×6 Pine Boards
- 1×4 Pine Boards
- 1×3 Pine Boards
- 1×2 Pine Boards
- Miter Saw
- Laser Level
- Stud Finder
- Pencil
- Drill
- Impact Driver
- Wood Screws
- Brad Nailer
- Brad Nails
- Wood Glue
- Spackling
- Putty Knife
- Sandpaper
- All Purpose Paintable White Caulk
- Caulk Gun
- 11 Hooks
(Similar)
STEP FOUR – DO THE WORK
After I gathered all of my supplies, it was time to get to work!
PREP WORK
Before attaching any wood to the wall, the first thing I did was tape, prime, and paint the wall. When researching, I had read that this step would save a lot of time later. I used the large paint roller to do this. I also used the angled paint brush to get into the corners.
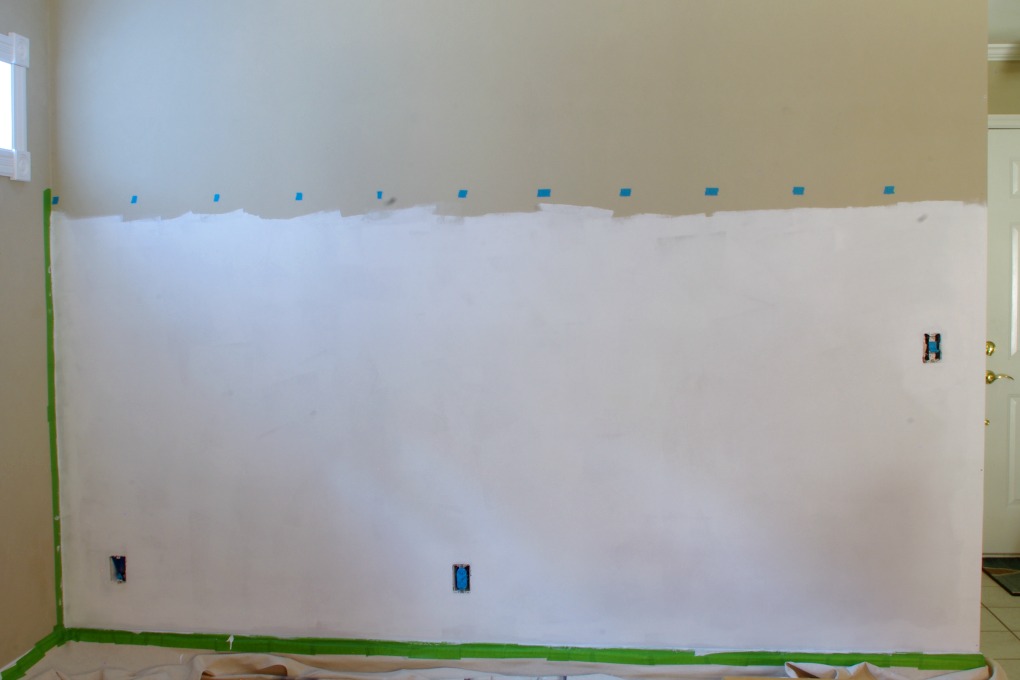
As you can see from the picture above, I didn’t worry too much about getting a straight line at the top. The top piece of wood would eventually be covering this area anyway.
I also primed and painted the boards before attaching them to the wall. I used a small paint roller for this step.
ATTACH THE HORIZONTAL BOARDS
To help with attaching the boards to the wall, I used my laser level to draw a line where the top horizontal boards would go. This made it a lot easier to see exactly where to put the boards. I also marked the studs so we knew where to put the screws.
Using the line I drew on the wall as a guide, my husband and I attached the horizontal 1×6 boards. He held the 1×6 boards against the wall while I attached them. We had to use two 1×6 boards across the top because we didn’t have a board long enough to cover the whole 124 inch wide wall. In order to make the two boards look as seamless as possible, I mitered the ends of the boards where they met on the wall. Then we did our best to line up the boards so that the seam where the boards met wasn’t very noticeable.
We used countersunk wood screws to attach the boards to the studs. To countersink the screws, I put some frog tape on the board where I was planning to drill. Then I used a 3/8 inch hole-boring drill bit to drill into the wood just deep enough for the screws to fit into the boards without sticking out. After that, I drilled pilot holes for the screws. Then I used my impact driver to attach the boards to the wall with wood screws, making sure to drive the screws into the studs. Since we were adding hooks
to the horizontal boards, it was important to secure these boards to the studs.
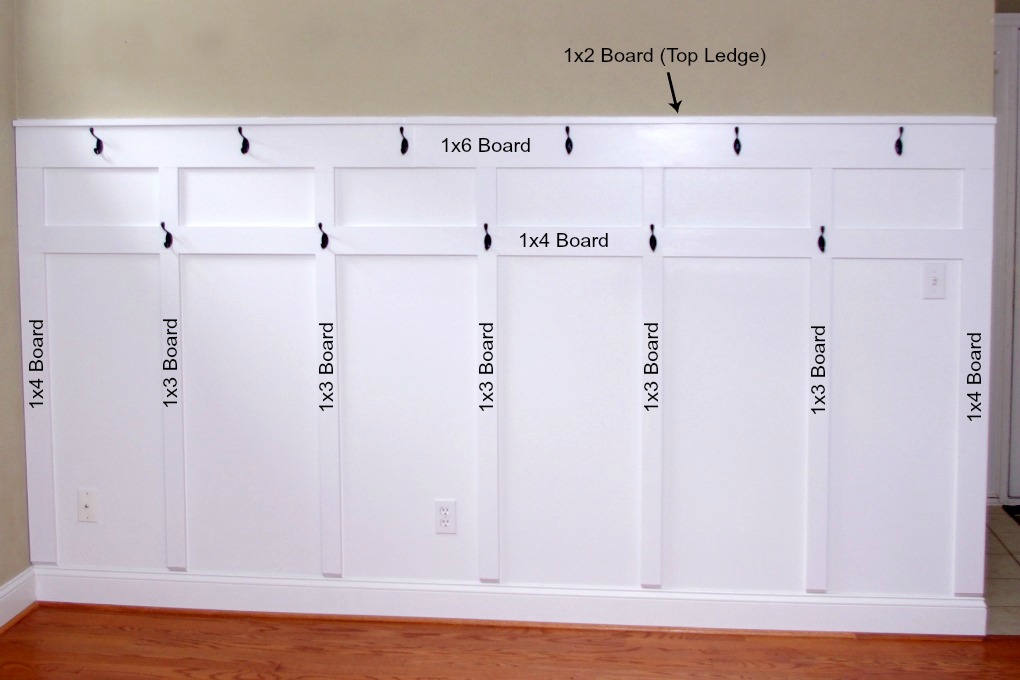
After the 1×6 boards were attached, we repeated the same process to attach the horizontal 1×4 boards.
By the way, I measured and cut the boards as we worked instead of cutting all of the boards in advance. This ensured that the boards were cut to exactly the correct lengths.
ATTACH THE VERTICAL BOARDS
After the horizontal boards were attached, it was time to add all of the vertical pieces.
I used my brad nailer to attach these boards to the wall. I continued to measure and cut these pieces as I worked.
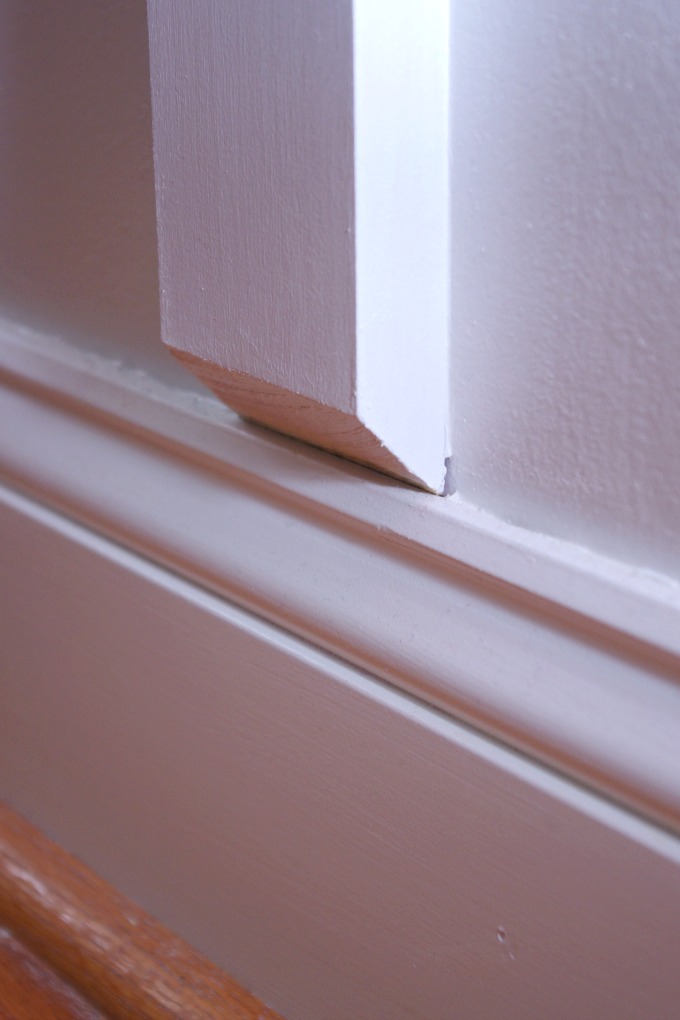
At the bottom of the vertical boards where they met the baseboards, I cut the boards at a 45 degree angle. This is so the boards don’t stick out too far over the existing baseboards.
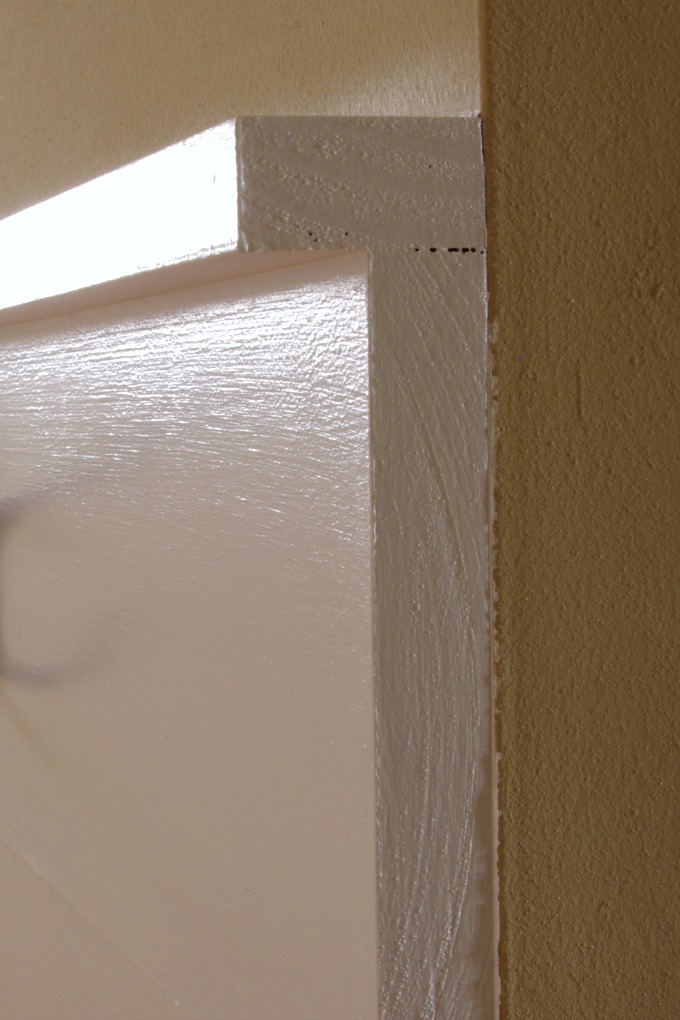
ATTACH A LEDGE AT THE TOP
After all of the horizontal and vertical boards were attached to the wall, it looked pretty good. To make it look even better, I added a decorative ledge to the top.
The ledge at the top is made out of 1×2 boards. I attached the 1×2 boards to the top of the 1×6 boards with wood glue and brad nails. This ledge is only for decoration purposes. We aren’t planning to actually put anything on it.
FINISHING WORK
The final steps were to make everything look pretty.
I began by filling in all of the gaps and holes left by the screws and nails with spackling. When it was dry, I sanded it smooth.
After that, I caulked all of the edges where the wood met the wall to make everything look as seamless as possible.
Then I added a final layer of paint using the small roller brush and angled paint brush.
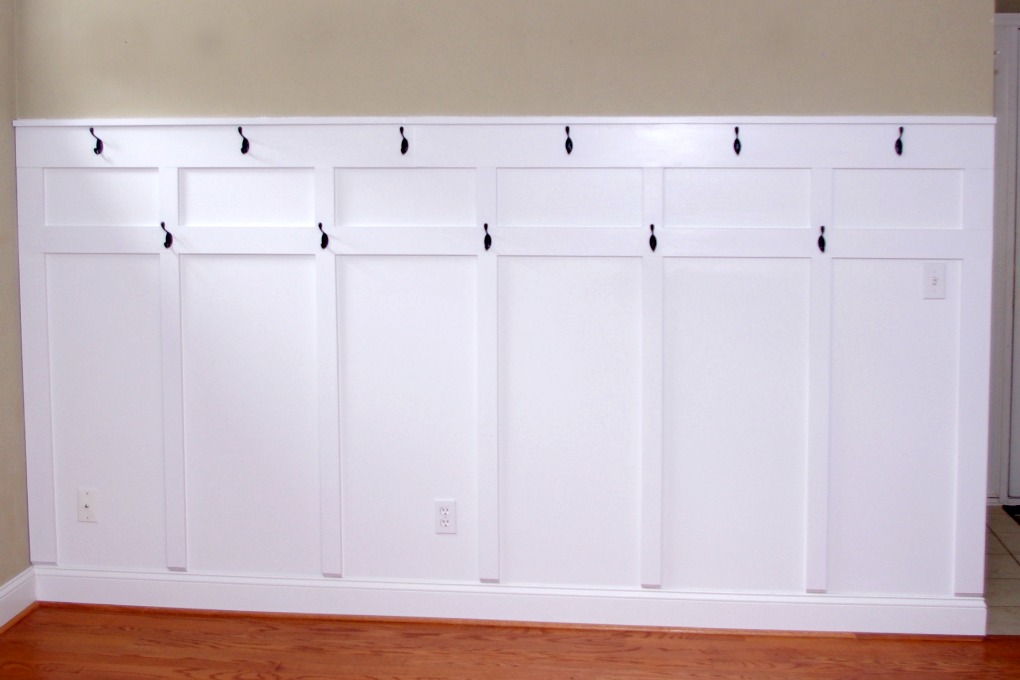
When all of the paint was dry, I added some hooks to the horizontal boards. I ended up using 6 hooks
on the top board and 5 hooks
on the middle board.

And that’s it! This wall has helped us keep our house a lot more organized. It is so nice to have a designated space to hang everything up!
How do you organize everything you bring in and out of the house on a daily basis? Do you have any board and batten areas or hooks in your house? Tell me about it in the comments!
Have a great day!
♥Jena♥
This post contains affiliate links. For more information, see my disclosures here.
Looks fantastic, would love to have this in my home. Thanks for sharing.
Thank you so much! It is my new favorite wall in the house!